Sunday, April 28, 2019

Pin Your Most Used List View on a Tab

Tired of going to a Tab and always switching the List View from Most Recent records to something you actually want to see?  Well there's a Lightning only feature you are going to love!

Step 1 - go to the tab that contains the List View you want to Pin.
Step 2 - Use the drop-down to select the List View you most commonly use
Step 3 - To pin the list view, click its pin icon Pin icon. Whenever you select that object, the pinned list view loads as the default list view.  To unpin the List View, click the Pin icon again.

Yep it's just that simple!


For more information see: https://help.salesforce.com/articleView?id=basics_pinned_list_views_lex.htm&type=5

Monday, March 18, 2019

Calculating NPSP Levels using a Formula Field

NPSP Levels provide a way of categorizing constituent's level of commitment and engagement.  For example you might have a level you call Major Donor to categorize those who contribute large amounts of money.

The assignment of engagement Levels are based on either a number or currency field. This could be existing field like Total Gifts or Average Gift Amount or formula field that returns a numeric value to handle more complex measurements.  An example of this would be a RFM calculation (Recency, Frequency, Monetary) or based a point based system.  

In this post we are going to take a look at a points based system.  By creating a formula field to use for our levels so that we can use more complex data points to determine our level of engagement for our constituents.   We are measuring engagement at the household level.

In this example we have four engagement levels, Endorsing, Contributing, Owning and Leading.  Each of our levels if represented by a specific number of points.  The more points the household has, the higher the level of engagement.


Step 1:  Create the formula field that calculates the points for our Level.

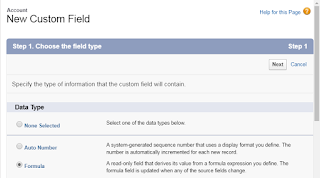
On the Account object create a new formula field with a return type of Number.


We'll create a formula field that will calculate our points based on how engaged the household is with our organization.  We'll measure this using three metrics 1) number of times someone in the household was a team captain at one of our walk events 2) number of gifts the household has given in the last 5 years 3) total dollar amount of lifetime giving of the household.

For each of these categories, the household will receive points.  The points for each of the three categories will be added together to come up with the total engagement score.  This engagement score will drive the engagement Level of the household.


Step 2:  Configure Levels to use the new calculated field.

You'll want to have setup your Level fields before you do this step.  For more information on configuring levels see:  https://powerofus.force.com/articles/Resource/NPSP-Create-and-Manage-Levels.

From the Level tab, choose New.  For each level complete the fields shown.  The example below if for our first level, Endorsing.  Households are in this level if they have and engagement score of 1 to 5.
  • Level Name:  Name you are calling this level
  • Target:  Object to hold the level.  In our example Account as we are setting the level at the Household.
  • Source Field:  Calculated field we created in Step 1 that determines our engagement score.
  • Level Field:  Field on the object that will store the name of the current level 
  • Previous Level:  Field on the object that will store the name of the previous level
  • Minimum Amount:  Minimum value that qualifies for this level
  • Maximum Amount:  Score has to be less than this value to qualify for this level
  • Engagement Plan Template:  (optional) template if tying this level to an engagement plan template.


Step 3:  Repeat this process for each Level desired.


Levels calculate in nightly batch - can force run the batch in NPSP Settings.


Monday, January 7, 2019

NPSP Soft Credit for Primary Contact on an Organizational Gift


Why would you use them? 

Your Nonprofit has several business owners want to be credited for gifts given by their business.

What's Involved?

  • Setup the Soft Credit Role for Organizational Opportunities:  From the NPSP Settings Tab Choose Donations >Contact Rolls page, set the Contact Role for Organizational Opps.

  • When entering a a new Account Opportunity, in the Primary Contact field, look up the contact who should receive the soft credit.
  • The Primary Contact selected will automatically receive a soft credit with the contact role you specified giving them the soft credit.


Helpful Tips

  • If you want to always have the Primary Contact for the business receive soft credit:
    • Add the Contact as the Primary Contact on the Organizational Account.
    • Add the primary contact field to the New Account Donation Quick action on the Account object and preset it's value to the Account’s primary contact.
  • If you want NPSP to stop generating automated soft credits for an Affiliation, remove the value in the Related Opportunity Contact Role field on the Affiliation record and leave it blank. 
  • Remember The Soft Credit Totals update when the nightly batch jobs run. If you need to recalculate soft credits outside of the nightly batch, you can manually recalculate the entire batch or for a single Account or Contact.


Monday, November 19, 2018

Visualize your List Views with List View Charts

List Views are handy for looking at subsets of data, you can enhance your list view by adding a chart to help visualize the data.

List View Filters

First create a view of information filtered by data important to you and then add a chart.

Create a New List View

Actions you can take for list views are available in the List View Controls menu (icon to access List View Controls).

Create the List View and Add Filters

  • Under List View Controls, select New. 
  • Give your list a name.
  • Choose who can see this list view.
  • Click Save. The Filters panel appears.
  • Click Show me, then select All objects to see all records not just those owned by you.
  • Add any additional filters desired.  In this example, we are filtering by Accounts with Total Gifts of 1,000 or more.
  • Click Done.

Select the List View Fields to Display

  • From the List View Controls menu, Select Fields to Display.
  • Use the arrows to add, remove, and reorder your visible fields.
  • Click Save

For more information see this help article.

List View Chart


  • Once you have your new List View created, you can create a Chart to visualize the data.
  • From the  Opportunities tab, select the the new List View you created.
  • Click list view charts icon.


  • In the Charts panel that appears, click list view charts gear icon and select New Chart.


  • Give the Chart a name and complete the other parameters and click Save.
  • Chart Type: Horizontal Bar
  • Aggregate Type: Sum
  • Aggregate Field: Total Gifts
  • Grouping Field: Billing State/Province


  • Chart now is available when you select the list view


Try it on your own in this Trailhead module


https://help.salesforce.com/articleView?id=customviews_listview_chart_create_lex.htm&type=5

Thursday, September 27, 2018

Helpful Date Calculations


Calculating a person's age from their birth date

Nonprofits, especially those dealing with minors, often need to know the age of their constituents.  Instead of having an Age field that is manually updated each year, we can calculate the person's age from the birth date they've given us.

The helpful formula below was taken from Saleforce's Knowledge Article Number 000230455.

First it checks to make sure that there is a value in the Birthdate field.  If there is, it then checks to take into account the person's birthday happened this year or still needs to come.

Since either the birthday can be in a leap year or today can be Feb 29 of a leap year, we need to make sure to compare the days, in a leap year, therefore we are comparing in the year 2000, which was a leap year.

The formula shown, calculates the age of the Contact by looking at the standard Salesforce Birthdate field.  

IF( NOT( ISBLANK( Birthdate ) ) ,
  IF( DATE( 2000 , MONTH( Birthdate ) , DAY( Birthdate ) ) <= DATE( 2000 , MONTH( TODAY() ) , DAY( TODAY() ) ),
     YEAR (Today()) - YEAR ( Birthdate ),
     YEAR (Today()) - YEAR ( Birthdate ) -1 ),
  null)


A more simple formula not taking into account the Leap Year would be:
IF( NOT( ISBLANK( Birthdate ) ) ,
IF(TODAY() >= DATE(YEAR(TODAY()), MONTH( Birthdate), DAY(Birthdate)), 
YEAR(TODAY()) - YEAR(Birthdate), 
YEAR(TODAY()) - YEAR(Birthdate) - 1),
 null)

Adding Years, Months or Days to a Date

These helpful formulas were republished from Salesforce's Example Date Formula document.

Adding Years to a Date

When adding years to a date you need to check that the future date is valid. That is, adding five years to February 29 (a leap year) results in an invalid date. The following formula adds num_years to date by checking if the date is February 29 and if the future date is not in a leap year.  If these conditions hold true, the formula returns March 1 in the future year. Otherwise, the formula sets the Date to the same month and day num_years in the future.  

The IF statement is checking for the leap year condition.  Replace the date in the formula with the date field to which you want to add the years.   Replace the num_years reference with the actual number of years you want to add.


IF(
  AND(
    MONTH( date ) = 2,
    DAY( date ) = 29,
    NOT( 
      OR( 
        MOD( YEAR( date ), 400 ) = 0, 
        AND( 
          MOD( YEAR( date ), 4 ) = 0,
          MOD( YEAR( date ), 100 ) != 0
        )
      )
    ) 
  ),
  DATE( YEAR( date ) + num_years, 3, 1),
  DATE( YEAR( date ) + num_years, MONTH( date ), DAY( date ) )
)

Adding Months to a Date

Adding months to a date is slightly more complicated as months vary in length and the cycle of months restart with each year. Therefore, a valid day in one month (January 31) might not be valid in another month (February 31). A simple solution is to approximate each month’s length as 365/12 days:

date + ( ( 365 / 12 ) * Number_months )

While this formula is a good estimate, it doesn’t return an exact date. For example, if you add two months to April 30 using this method, the formula will return June 29 instead of June 30. Returning an exact date depends on your organization’s preference. For example, when you add one month to January 31, should it return February 28 (the last day of the next month) or March 2 (30 days after January 31)?
This formula does the following:
  • Returns March 1 if the future month is a February and the day is greater than 28. This portion of the formula performs the same for both leap and non-leap years.
  • Returns the first day of the next month if the future month is April, June, September, or November and the day is greater than 30.
  • Otherwise, it returns the correct date in the future month.


This example formula adds two months to a given date. You can modify the conditions on this formula if you prefer different behaviors for dates at the end of the month.
  DATE(YEAR( date ) + FLOOR( ( MONTH ( date ) + 2 - 1 ) / 12 ),
  MOD( MONTH ( date ) + 2 - 1 + 
    IF( DAY ( date ) > CASE( MOD( MONTH( date ) + 2 - 1, 12 ) + 1, 
      2, 28,
      4, 30,
      6, 30,
      9, 30, 
      11, 30,
      31 ), 1, 0 ), 12 ) + 1,
    IF( DAY( date ) > CASE( MOD( MONTH( date ) + 2 - 1, 12 ) + 1,
      2, 28, 
      4, 30, 
      6, 30, 
      9, 30, 
      11, 30, 
      31 ), 
    1, DAY( date )
  )
)

Adding Days to a Date

If you want to add a certain number of days to a date, add that number to the date directly. For example, to add five days to a date, the formula is date + 5.

date + Number_days 


Tuesday, July 10, 2018

Reports and Cross Filters

A colleague of mine reminded me today of an under-used feature of Salesforce Reporting, Cross Object Filters so I thought I'd write a quick blog about them.

What are they and when might I need to use them?

What are they?

Cross filters are used to further limit your results by including or excluding records from related objects and their fields. You can apply cross filters by themselves, or in combination with report field filters.

Sample Use Case

We want to add Contacts to a campaign who have made a donation of  over $100's in the past year excluding in honor/in memory of donations.

Why is this a good Use Case?  We need to base our report on Contacts in order to take advantage of the Add to Campaign button from a report but we need to limit our data by information only found on the opportunity record such as the in honor/in memory of indicator.

How do we do it?

In this case we'll want to create a report based on Contacts and Accounts but we will leverage the cross filter using the WITH condition to show Contacts WITH opportunities in the last year over $100 that are not of type in honor/in memory. 


First we'll create the report based on  Contacts and Accounts

Next we'll add any filters we want to use from the Contact or Account object.  In my example I'm excluding anyone who has the indicator on their contact record of Do Not Contact.

Now we will add our cross filter.  I am cross-filtering on the opportunity object and selecting any contacts that have opportunities that are not of type Honor or Memorial. 

I'll start by choosing Add Cross Filter from the filters drop-down.


This will  bring up the Cross Filter screen where I can choose my "Show Me" options.  I want to see Contacts WITH Opportunities so I'll choose With from the drop-down and Opportunities as the Secondary Object and click Apply.


Next I'll click on the Add Opportunities Filter to add my filter to exclude tribute type gifts.

I search for my opportunity field, in this case Tribute Type, choose the Operator of not equal to and choose the values that I don't want included (Honor and Memorial).  Then click Apply.  We can add additional filters like gift amount if desired by repeating this process.


Now my report contains filters from the Contact object (top) and Cross filters from my Cross filter object (bottom).


At the time of this blog posting, the Add to Campaign button feature is not available in Lightning.  To see the Add to Campaign button.  Switch to Classic view and Run the report.


Note:  When I run the report, I can only display fields from the Report Type objects (Contacts and Accounts).  Fields from the Cross Filter object are not available to add to the display results.

For more information on cross-filters see these awesome resources.

Saturday, June 30, 2018

Working with tasks

Summer '18 release delivers some important new lightning Task features.

Now, in lightning, list view columns are sortable.


 There are three ways to work with tasks.
  • Table View
  • Kanban View
  • Split View

Table View
Table View is the view that most people are use to seeing and lists the records in a table format.


Kanban View
Kanban View displays the tasks in a Kanban card format based on the status of the task.  Tasks can be rearranged quickly from one status to another by simply dragging them to the new section.  It is a great visual view to see how tasks are progressing.


Spit View
Split View allows you to see the tasks in the list view and additional information about the selected one.  Staff can click on tasks in the list and quickly see the details of the task.  Buttons at the top of the task make editing key information on the task a snap!


Hop easily from the various views using the Display as drop-down

Salesforce Favorites: Frequently Used Information at Your Finger Tips

Always need reports from a specific folder? Have a report that you run frequently? Have that one Account that you are constantly nurtur...